Maven notes – Exercise
Setup Maven
- Download latest Maven (3.3.9) from http://maven.apache.org/download.cgi
- Unzip it to the folder you want to install Maven.
- Add both M2_HOME and MAVEN_HOME variables in the Windows environment, and point it to your Maven folder (C:\Apache Maven\apache-maven-3.3.9).
- Update PATH variable, append Maven bin folder – %M2_HOME%\bin, so that you can run the Maven’s command everywhere.
- Restart/log off windows if necessary.
- To verify it, run mvn –version in the command prompt.
Setup local repository path
<localRepository>D:\MAVEN_REPO</localRepository>
Default location for local repository is ${user.home}/.m2/repository. So I change it. Read more…
Maven notes – Introduction part 1
What is Maven?
Apache Maven is a software project management and comprehension tool. Based on the concept of a project object model (POM), Maven can manage a project’s build, reporting and documentation from a central piece of information.
Maven use Convention over Configuration which means developers are not required to create build process themselves. When a Maven project is created, Maven creates default project structure. Developer is only required to place files accordingly and he/she need not to define any configuration in pom.xml. In order to build the project, Maven provides developers options to mention life-cycle goals and project dependencies (that rely on Maven pluging capabilities and on its default conventions). Much of the project management and build related tasks are maintained by Maven plugins.
How maven works Read more…
Why I like her?
Once upon a time she asked me why I like her. A difficult question to answer. Because at that time I don’t understand why can fall in love with her. I kept asking myself why I fell in love with her. It takes a few weeks for me to be able to answer that question.

So, this is six main reasons why I love her: Read more…
Convert a Standalone MongoDB to a Replica Set
I already have standalone mongod instance (called svr01) and want to convert into four member replica set (1 primary, 2 secondary, 1 arbiter). My objective is to distribute read query through secondaryPreferred read preference.
Create siteRootAdmin user to manage replica set.
#connect as admin
mongo --host localhost --port 27001 -u admin -p admin --authenticationDatabase admin

#in mongo shell
use admin
db.createUser( {
    user: "siteRootAdmin",
    pwd: "admin",
    roles: [ { role: "root", db: "admin" } ]
});
Create key file, this file will be use to internal authentication (between mongod instance). For simplicity I cerate file filled with string “password” named keyFile and save to /var/. Set permission to 600 (owner only). Read more…
Play! Framework – Deployment using Jenkins [Create Jobs]
For the first time, you can click on create new jobs at home page. Or you can click New Item.
Choose Freestyle project and fill Item name, click Ok.


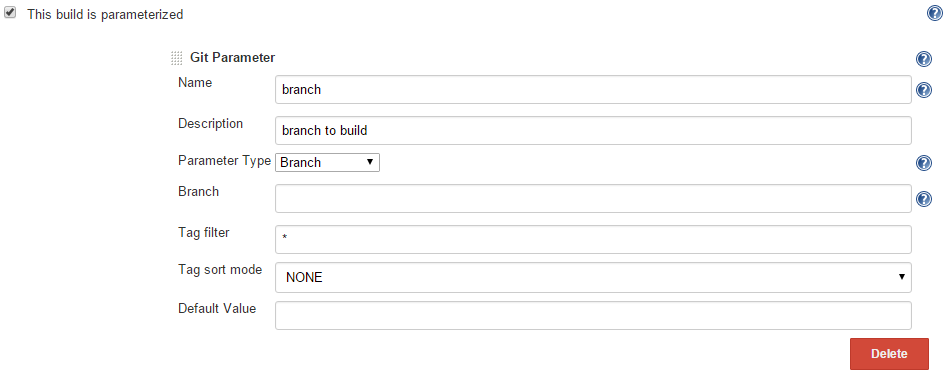
Adding build parameter, I want to build specific branch, so I added git parameter
In source code management I choose git then fill the config.

In section Build, choose Invoke Play! Framework. We can see this choice if we already installed the plugin. Fill the config. Play!Framework Installation choice will appear if we already configure Play! in Configure System.


The last step is configure Post-build Actions, I want to sent the artifact.

You must configure ssh server in Configure System.
Hadoop 2.7 Installing on Ubuntu 14.04 (Pseudo-distributed mode)
Installing Java
Please read this artcile
Adding a dedicated Hadoop system user
For Hadoop, the accounts should have the same username on all of the nodes. This account is only for managing your Hadoop cluster. Once the
cluster daemons are up and running, you’ll be able to run your actual MapReduce jobs from other accounts.
bluething@ubuntu:~$ sudo addgroup hadoop
bluething@ubuntu:~$ sudo adduser --ingroup hadoop hadoop-user
Installing SSH
ssh has two main components:
ssh : The command we use to connect to remote machines – the client.
sshd : The daemon that is running on the server and allows clients to connect to the server.
The ssh is pre-enabled on Linux, but in order to start sshd daemon, we need to install ssh first.
Verify SSH installation
bluething@ubuntu:~$ which ssh
/usr/bin/ssh
bluething@ubuntu:~$ which sshd
bluething@ubuntu:~$ which ssh-keygen
/usr/bin/ssh-keygen
Install openssh-server
bluething@ubuntu:~$ sudo apt-get install openssh-server
bluething@ubuntu:~$ which sshd
/usr/sbin/sshd
Generate SSH key pair
bluething@ubuntu:~$ su - hadoop-user
hadoop-user@ubuntu:~$ ssh-keygen -t rsa -P ""
This command will create an RSA key pair with an empty password. Generally, using an empty password is not recommended, but in this case it is needed to unlock the key without your interaction (you don’t want to enter the passphrase every time Hadoop interacts with its nodes).
If you want to see public key form

hadoop-user@ubuntu:~$ more /home/hadoop-user/.ssh/id_rsa
Enable SSH access to your local machine with this newly created key.
hadoop-user@ubuntu:~$ cat $HOME/.ssh/id_rsa.pub &amp;amp;amp;amp;amp;amp;amp;gt;&amp;amp;amp;amp;amp;amp;amp;gt; $HOME/.ssh/authorized_keys
Test the SSH setup by connecting to your local machine with the hadoop-user user. The step is also needed to save your local machine’s host key fingerprint to the hadoop-user user’s known_hosts file.
hadoop-user@ubuntu:~$ ssh localhost
The authenticity of host 'localhost (127.0.0.1)' can't be established.
ECDSA key fingerprint is 5b:5d:57:1a:08:34:51:9d:b2:26:3b:19:b3:84:eb:a0.
Are you sure you want to continue connecting (yes/no)? yes
Warning: Permanently added 'localhost' (ECDSA) to the list of known hosts.
Welcome to Ubuntu 14.04 LTS (GNU/Linux 3.13.0-24-generic x86_64)

 * Documentation:  https://help.ubuntu.com/

The programs included with the Ubuntu system are free software;
the exact distribution terms for each program are described in the
individual files in /usr/share/doc/*/copyright.

Ubuntu comes with ABSOLUTELY NO WARRANTY, to the extent permitted by
applicable law.

hadoop-user@ubuntu:~$ exit
logout
Connection to localhost closed.
hadoop-user@ubuntu:~$
Installing Hadoop
Downloading Java JDK on Linux via wget
Use this command for download Oracle JDK 8u60
wget --no-check-certificate --no-cookies --header "Cookie: oraclelicense=accept-securebackup-cookie" http://download.oracle.com/otn-pub/java/jdk/8u60-b27/jdk-8u60-linux-x64.tar.gz
This wget essentially passes a cookies which pretends user has accepted the agreement
Play! Framework – Deployment using Jenkins [Installation and Configuration]
System requirement:
- Java 7 or higher
- Jenkins installation
sudo wget -O /etc/yum.repos.d/jenkins.repo http://pkg.jenkins-ci.org/redhat-stable/jenkins.repo
sudo rpm --import https://jenkins-ci.org/redhat/jenkins-ci.org.key
sudo yum install jenkins
-
Add jenkins to startup and then start
sudo chkconfig jenkins on
sudo service jenkins start
-
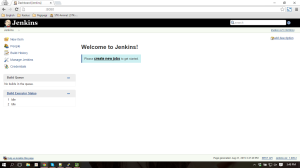
Check if Jenkins had been running, go to http://your_ip:8080/
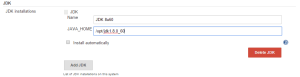
- Configure JDK
Go to Manage Jenkins – Configure System. In JDK section set java home.
- Add ssh configuration (for git)
cd /var/lib/jenkins/
sudo mkdir .ssh
sudo nano config
Fill config file with
Host repo your_git_ip
    HostName your_git_ip
    IdentityFile /var/lib/jenkins/.ssh/your_git_key
    User your_git_username
Tes ssh config
sudo su -s /bin/bash jenkins
git ls-remote -h ssh://your_git_username@your_git_ip/your_git.git HEAD
If result is are “too open”, change your_git_key permission to 600
Change owner of config and keysudo chown jenkins:jenkins your_git_key sudo chown jenkins:jenkins config
- Get activator
download activatorwget http://downloads.typesafe.com/typesafe-activator/1.3.5/typesafe-activator-1.3.5-minimal.zip
unzip to /opt and change owner jenkins:jenkins
chown jenkins:jenkins -R activator-1.3.5-minimal/


Moving git repository to new server
1. Fetch all of the remote branches and tags from the existing repository to our local index
git fetch origin
2. Check all branch
git branch -a

3. Add new ssh config for new server. Create new file with text editor, I use notepad++, name with config. For windows save in C:\Users\sashihara\.ssh. After this you will have 3 file, config, id_rsa, id_rsa_aws.
Host host1 ip_host1
 HostName ip_host1
 IdentityFile C:\Users\sashihara\.ssh\id_rsa
 User gituser

Host host2 ip_host2
 HostName ip_host2
 IdentityFile C:\Users\sashihara\.ssh\id_rsa_aws
 User gituser
4. Add new remote origin, give different name. You must already have new git repository (repo/app/new.git)
git remote add origin-new ssh://gituser@ip_host2/repo/app/new.git
5. Push to a new origin
git push --all origin-new
6. Push tags to a new origin
git push --tags new-origin
7. [optional] remove origin and rename new origin
git remote rm origin
git remote rename origin-new origin
Export PUTTY Sessions list
Type this command on command prompt
regedit /e "%userprofile%\desktop\putty-sessions.reg" HKEY_CURRENT_USER\Software\SimonTatham\PuTTY\Sessions
That command will export putty session list to putty-sessions.req file locate on Desktop
If you want to export all setting, use this command
regedit /e "%userprofile%\desktop\putty.reg" HKEY_CURRENT_USER\Software\SimonTatham
Aku
My Link

